This page explains how to generate a mTLS (Mutual Transport Layer Security), signing or a combined mTLS/signing certificate to use with the Data Integration Platform.
Links to all onboarding steps
- Step 1: Accessing DIP and verifying company details
- Step 2: Managing your company’s users within DIP
- Step 3: Managing your GlobalSign account as part of DIP
- Step 4: Managing DIP certificates
- Step 5: Domain verification
- Step 6: Creating a Signing/mTLS certificate
- Step 7: Managing your DIP / DCP IDs
- Step 8: Managing your DIP Message Channels
Before you start
To create you certificate or signing you will need:
- certificate generation capability or tool to create a PFX file.
Examples using Azure Key Vault and native OpenSSL commands are provided below.
Generate CSR and KEY file
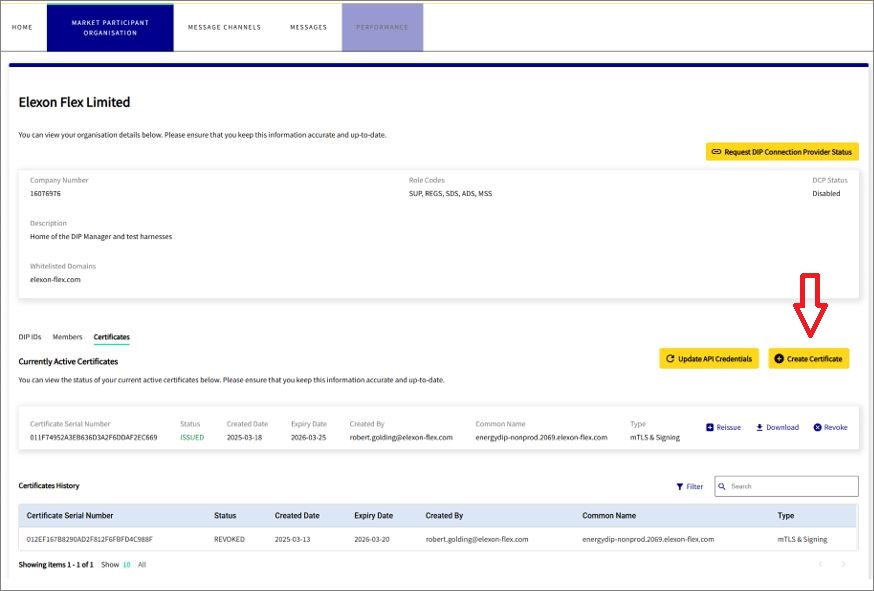
- login to the DIP as Certificate Admin
- from the Market Participant menu select the Certificates tab
- select the Create Certificate option
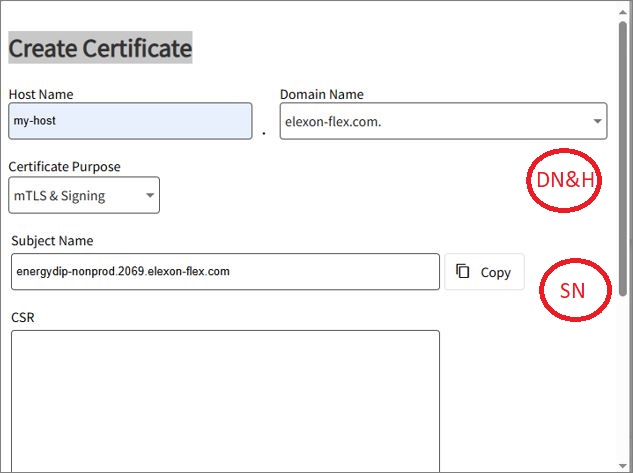
From the Create Certificate pop-up:
- enter the required Host Name & Domain Name. Domain name is taken from a drop down populated by the list of domains registered against the organisation.
- select ‘Certificate Purpose’ to choose a “mTLS” (for DCPs), “Signing” (for MPs) or “mTLS & Signing” certificates (both)
- subject name is generated from values provided
- select Copy – this will copy the Subject Name – SN
- copy the Domain Name & Host – DN&H
Generate CSR and KEY file (Azure Key Vault version)
Using the details established from the previous step, continue with the following:
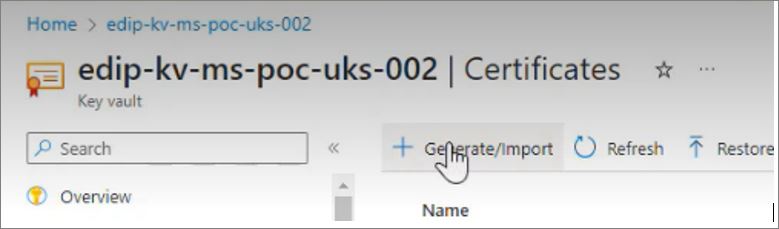
- open the Certificate Creation Tool (e.g. Azure Key Vault)

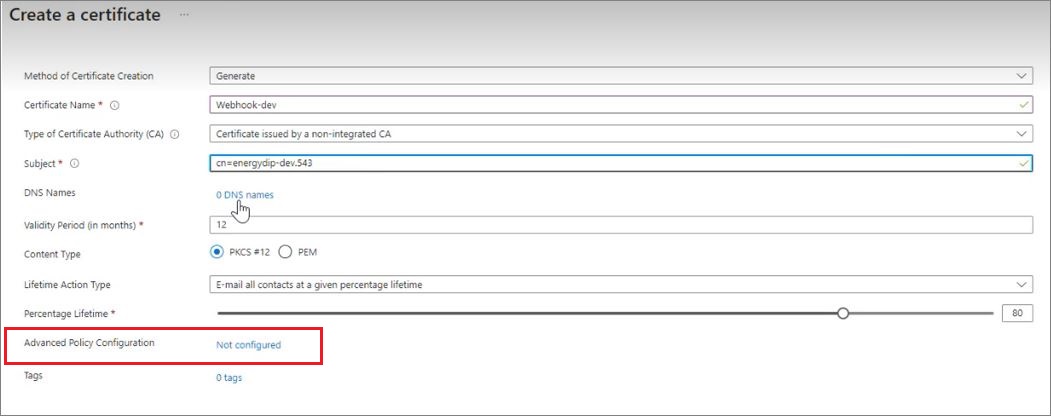
- click (select) to generate a certificate (in AKV click Generate/Import)
- give the certificate a name (no spaces)
- choose ‘Certificate used by non-integrated CA’ from drop down
- enter ‘cn=‘ then paste the SUBJECT NAME (SN) copied from previous step
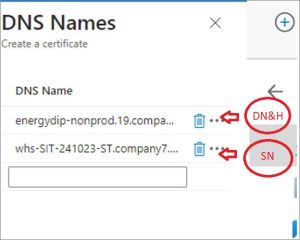
- click ‘DNS Names’ and complete the 2 entries – SN & DN&H copied from previous step
- click ‘Not configured’ next and ensure Key Size is 4096

Advanced Policy Configuration screen
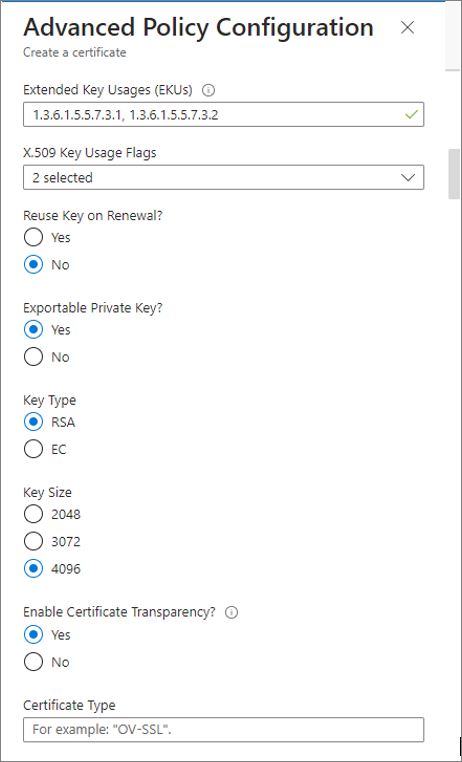
- Click ‘Create’ button to create CSR and KEY files
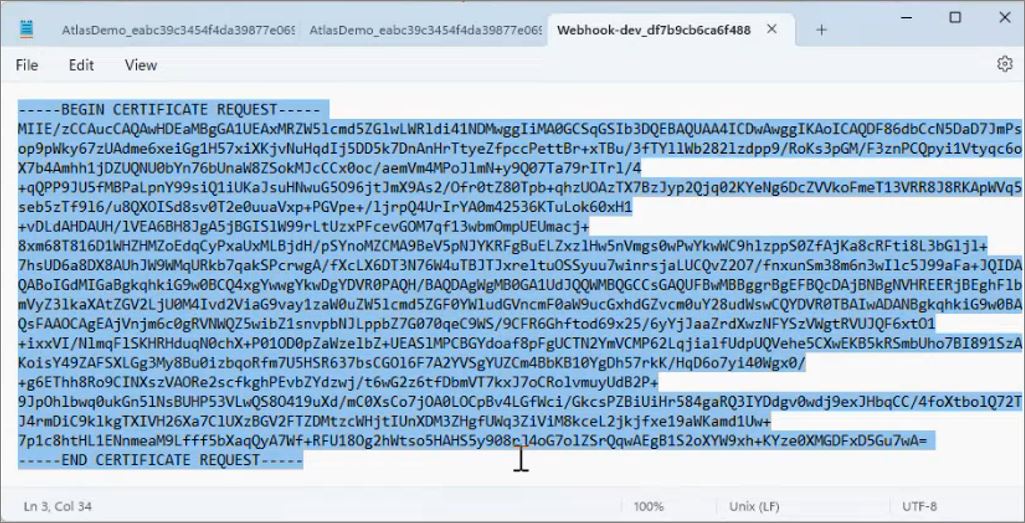
- Open the generated CSR
- Download CSR

Generate CSR & KEY file (OpenSSL version)
Using the Subject Name (SN) and the Host & Domain Name (H&DN) copied from previous step, enter the following command OpenSSL command
openssl req -new -newkey rsa:4096 -nodes -keyout mtlscert.key -out mtlscert.csr -subj “/CN=<SN>” -addext “subjectAltName = DNS<H&DN>, DNS:<SN>”
This will generate two files: CSR & KEY files.
Load CSR file into DIP
- open the downloaded CSR file into a text editor.
- select the Certificate Text
Generate CER File
- paste the Certificate Text into the CSR field in DIP
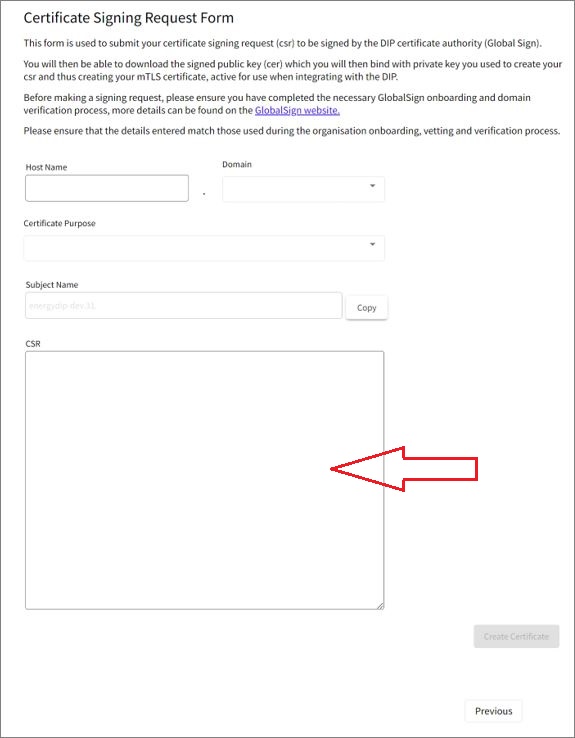
- click ‘Create Certificate’
- notification at top right of screen advises successful certificate generation
Download CER file from DIP
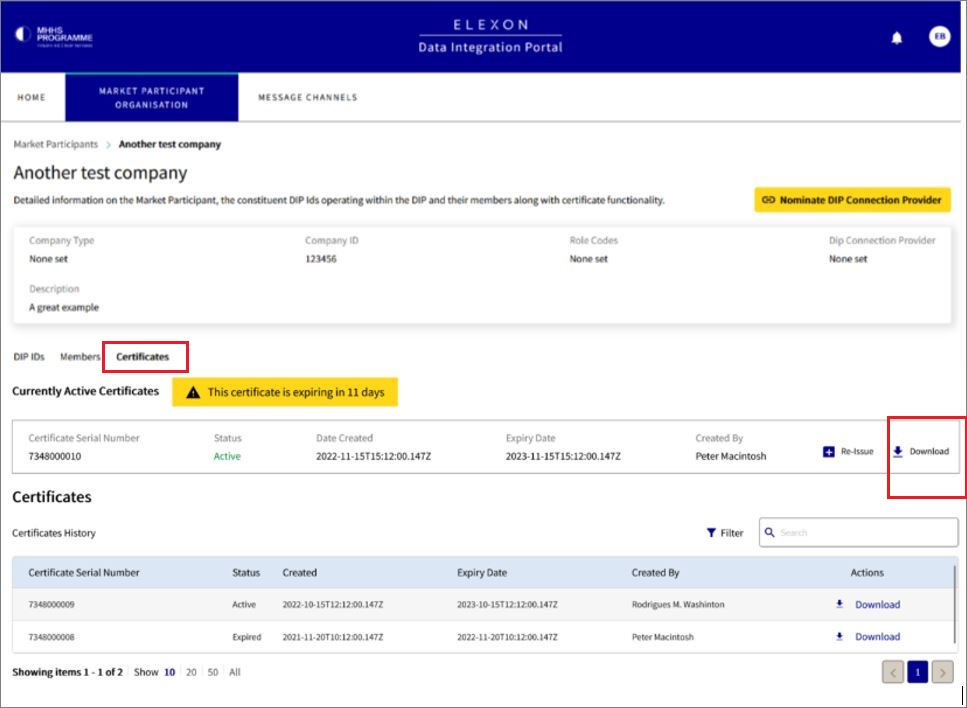
The Certificate Admin will be presented with a list of certificates associated with the organisation and can DOWNLOAD the ACTIVE certificate. The list of your available certificates are displayed within Market Participant menu
- Click ‘Certificates’ tab and check certificate is ACTIVE
- Click Download to utilise the new ACTIVE certificate
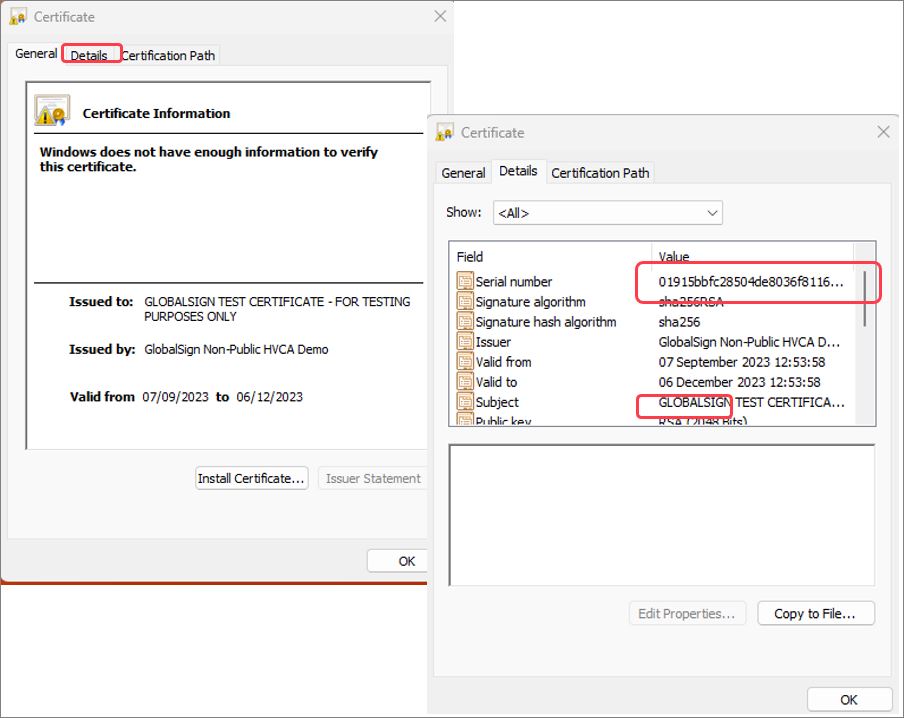
- open the downloaded Certificate file and Click ‘Details’ Tab.
- check validity by comparing Serial Number matches.
- check Subject is as expected
Merge CER & KEY file to generate PFX certificate (Azure Key Vault version)
The final stage of the process must be conducted within the Certificate Generation tool chosen earlier.
- select menu option ‘Merge Signed Request’
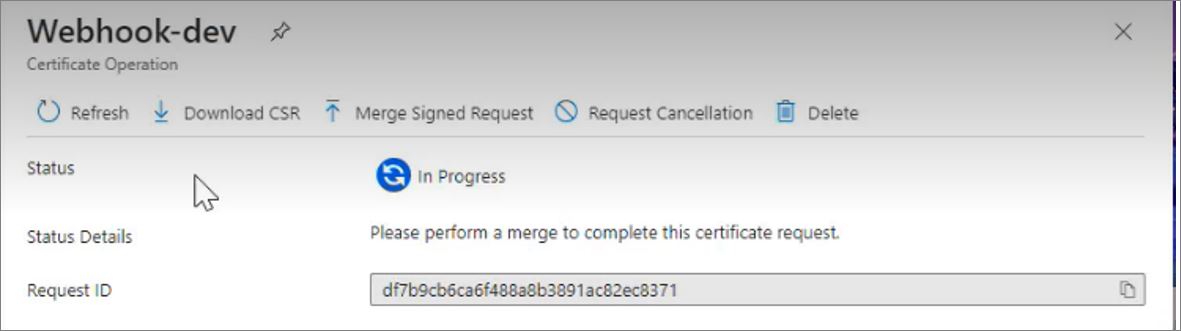
- select the FILE downloaded from the DIP Portal (a .cer file – example shown below)

- pop-up will confirm the merge was successful
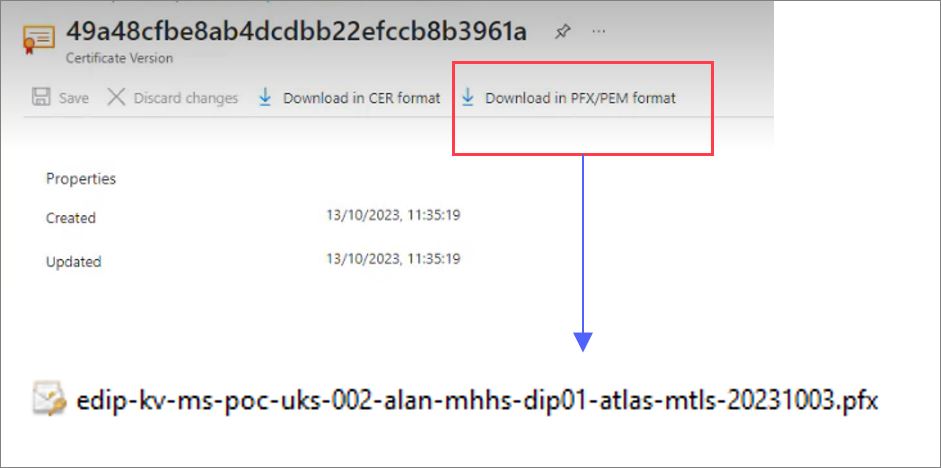
- the certificate must now be downloaded as a PFX WITHOUT Password.
- select the certificate and choose ‘Download in PFX/PEM Format’
Merge CER & KEY file to generate PFX certificate (OpenSSL version)
To generate the PFX file enter the following command OpenSSL command
openssl pkcs12 -export -out mtlscert.pfx -inkey mtlscert.key -in mtlscert.cer -password pass:
This will merge the CER and KEY generate a PFX file.