We use an external vetting service called GlobalSign Atlas to establish that the primary Certificate Admin can represent your company. This is an important security measure that verifies both the company and the individual.
You will need to set up a GlobalSign Atlas account to continue with other parts of the onboarding process.
Links to all onboarding steps
- Step 1: Accessing DIP and verifying company details
- Step 2: Managing your company’s users within DIP
- Step 3: Managing your GlobalSign account as part of DIP
- Step 4: Managing DIP certificates
- Step 5: Domain verification
- Step 6: Creating a Signing/mTLS certificate
- Step 7: Managing your DIP / DCP IDs
- Step 8: Managing your DIP Message Channels
It’s important to know:
- it can help to let your receptionist know an anonymous call may be received
- this part of the vetting can take up to 72hours
- the DIP Manager has no control over this process.
Whilst we are not able to influence this part of the process, you can raise a ticket on Elexon Support if you have any queries.
Follow the instructions on this page to set up your GlobalSign account or read more on how GlobalSign vetting works.
Set up a GlobalSign Atlas account (for Certificate Admins only)
This activity is to be completed by Certificate Admins only.
- Log in to the DIP
- Go to the Certificates tab and click on the link under GlobalSign Registration.
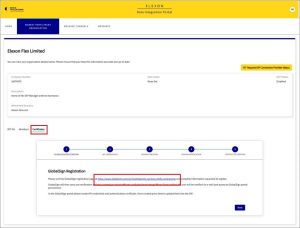
- This will take you to a dedicated MHHS page on the GlobalSign website. On that page, go to the form under ‘Get Started with Atlas’.
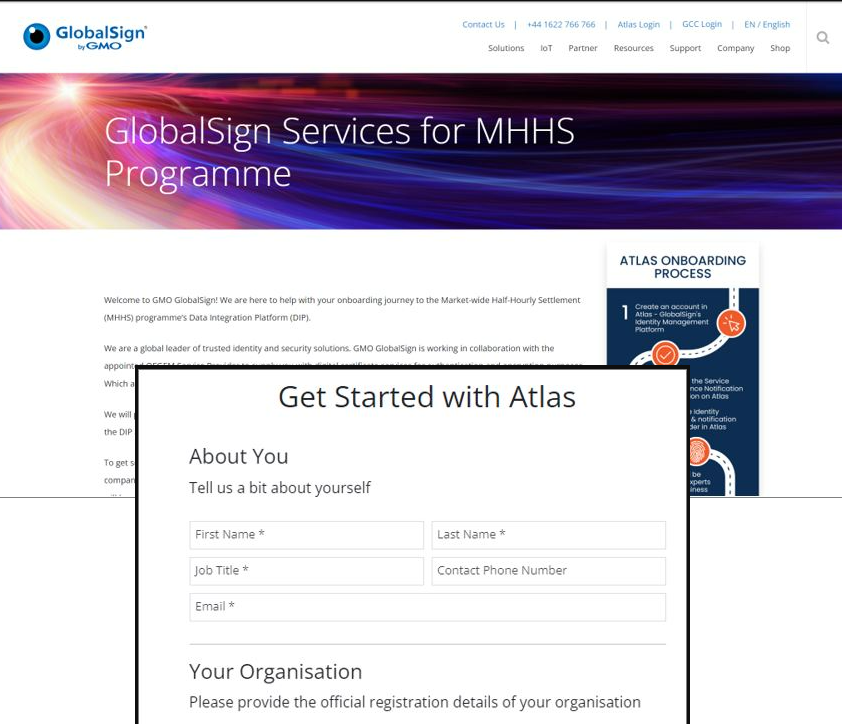
- Enter the Certificate Admins’ name and job title.
- Enter the email address of your Primary Certificate Admin . This email address will be used for the vetting process only. You can use a generic company email which is available to multiple people to monitor but must be accessible by the Primary Certificate Admin.
- Enter a direct phone number for the Primary Admin into Contact Phone Number. This will need to be used if the primary verification is unsuccessful.
- Click ‘I am not a robot’ then submit.

Global Sign will then contact the named individual and verify they are a current full-time employee.
What happens next?
You will receive two emails.
- a confirmation email explaining 12 steps that you will complete
- an invitation to the GlobalSign Atlas PortalThese two emails are usually received within 30 minutes of completing the GlobalSign Atlas registration form.
These 12 steps are also explained in the end to end onboarding guide.
You will also receive
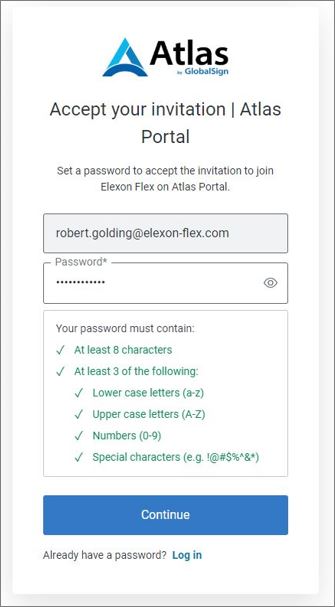
Accept your invitation to the Atlas Portal
You will receive an invitation to access the Atlas Portal. Set up a password to continue.
Approve Quotation
You will now have access to your Global Sign Atlas account.
On your dashboard, items that require attention are shown as ‘To Do’, highlighted in yellow. Complete the following:
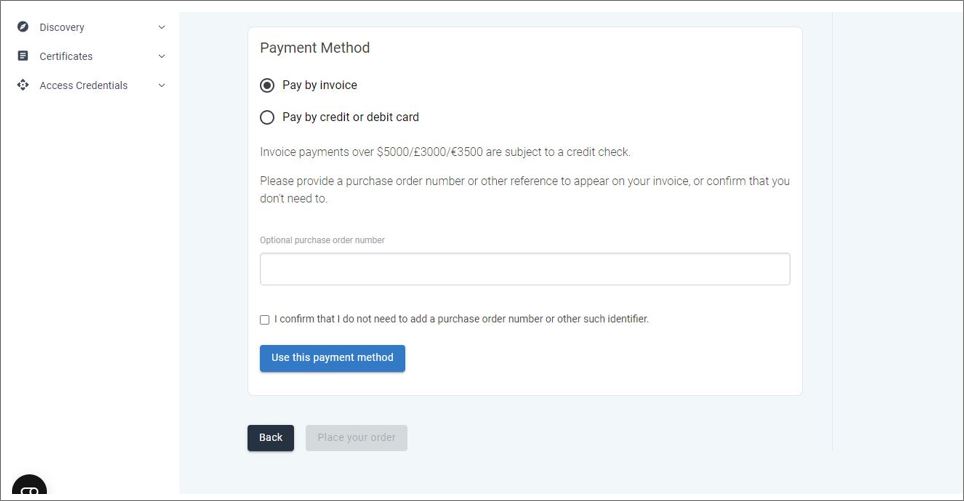
Set a payment method
This is only required for the GlobalSign system to function. No actual payment is required, and no invoices are sent.
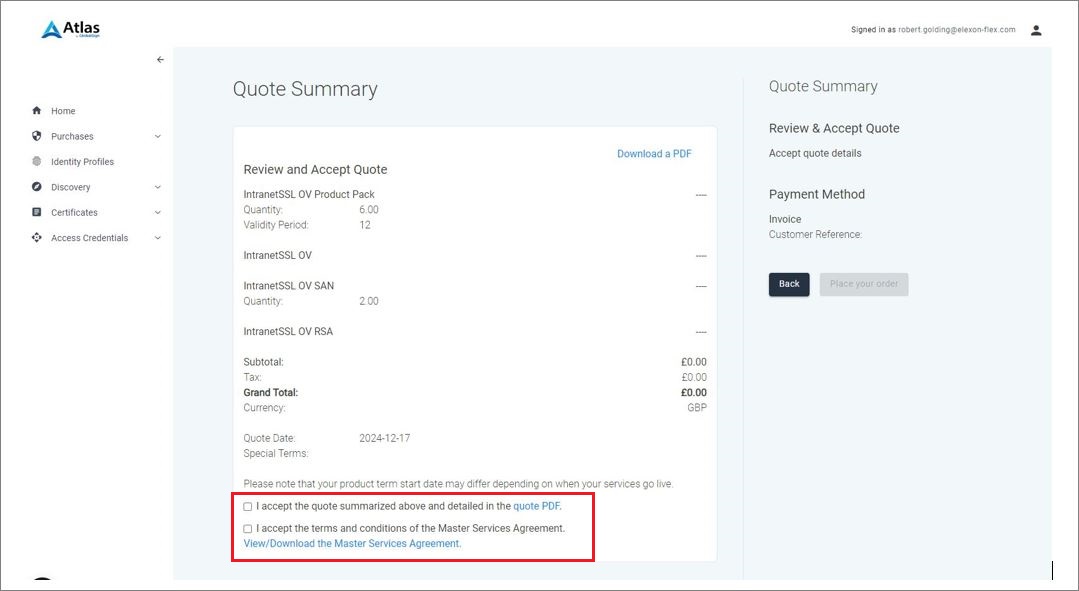
You will receive an email advising your quotation is ready. Login to Atlas and click the ‘View and Accept Quote’ tile.
The £0 quotation will appear. To complete the quotation:
- Check the boxes to accept the quotation and Master Services Agreement.
- Click the ‘Use this payment method’ button.
This will return you to the dashboard.
Request Identity Profile
The dashboard will default to 3 tiles. Only start this step once the ‘Request Identity Step’ tile has turned yellow. This could take up to 20-30 minutes.
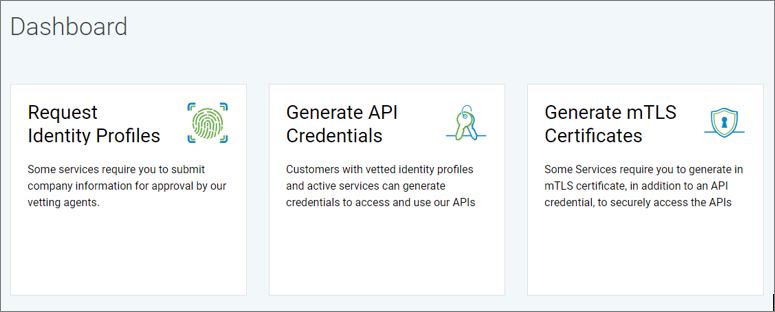
The Request Identity Profile tile now turned yellow.

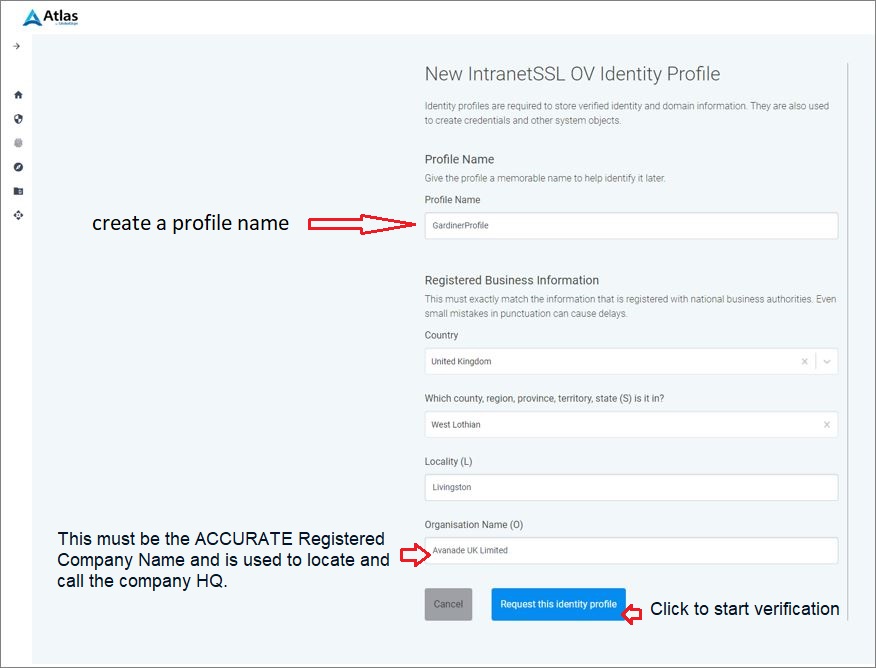
Create the Identity Profile by completing each field. These will be used to verify the name provided is a known full-time employee of the company named.
GlobalSign verification
GlobalSign will now carry out their vetting process. This can take up to 72 hours. In most cases this will less than 24 hours.
Do not proceed until a verification email has been received.
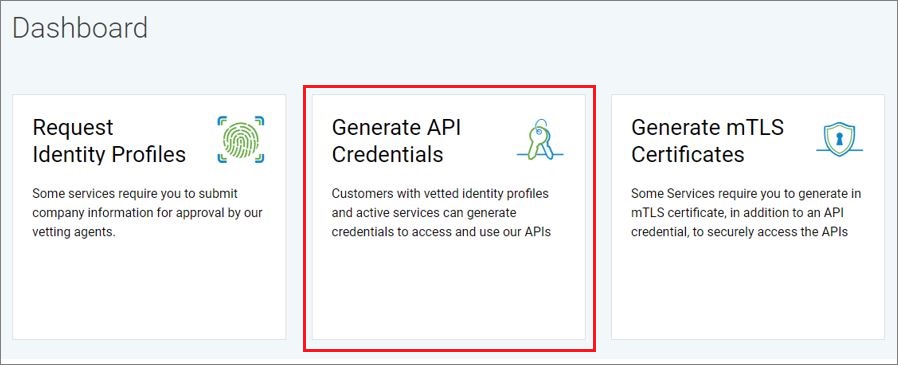
Generate GlobalSign API credentials
This can only be done once you have received your verification email.
At this point the Primary GDS Admin may want to handover the rest of the on-boarding tasks to technical staff as it involves the creation of PKI certificates. See Adding GlobalSign users section below.
You will need to action the following steps:
- create API credentials (secret and API key)
- generate CSR and KEY file
- load the CSR file into GlobalSign
- generate the CER file
- download the CER file from GlobalSign
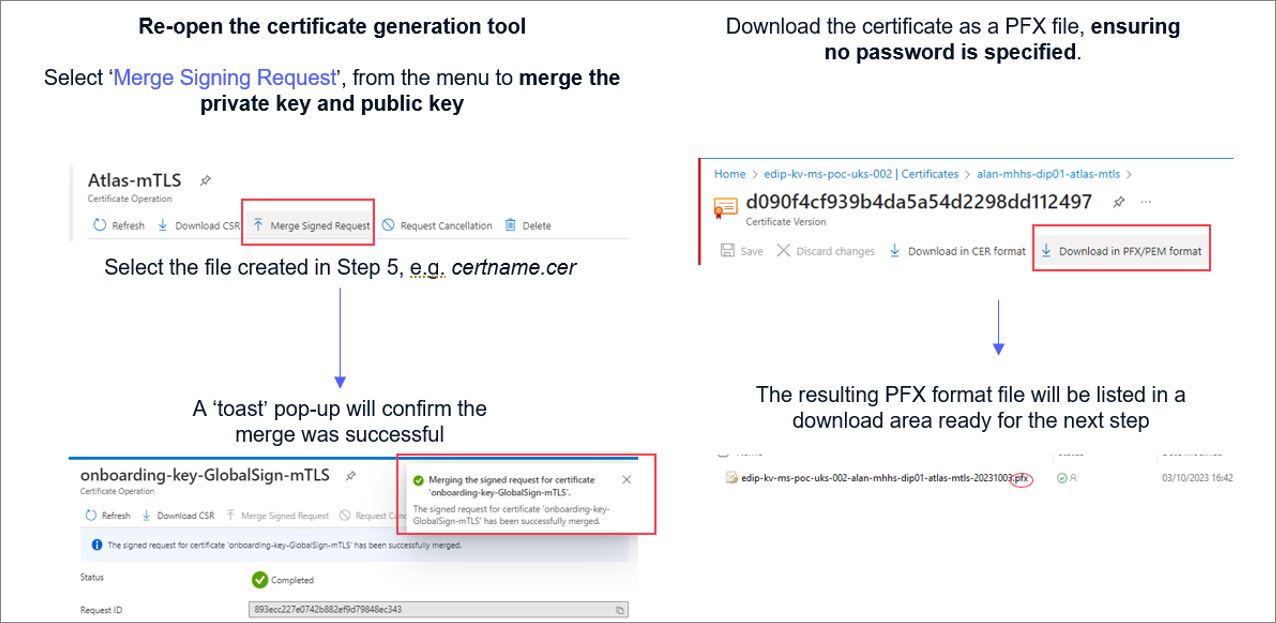
- merge the CER and KEY files to generate the PFX certificate
- upload the GlobalSign API key and Secret with the PFX certificate into the DIP
Create API credentials
This must be carried out by the Certificate Admin.
Login to GlobalSign Atlas and select ‘Generate API Credentials’ option.
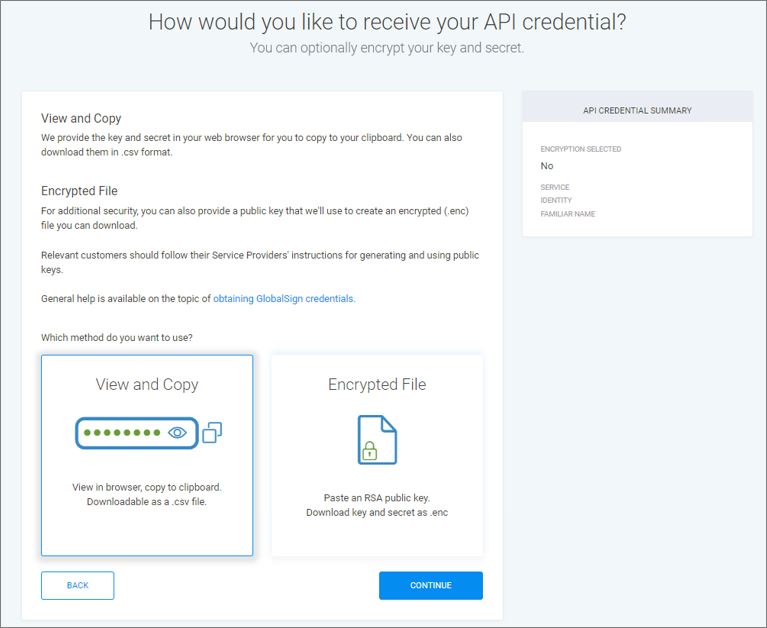
You must select ‘View and Copy’ in the ‘How would you like to receive your API credentials’ page, then click CONTINUE.
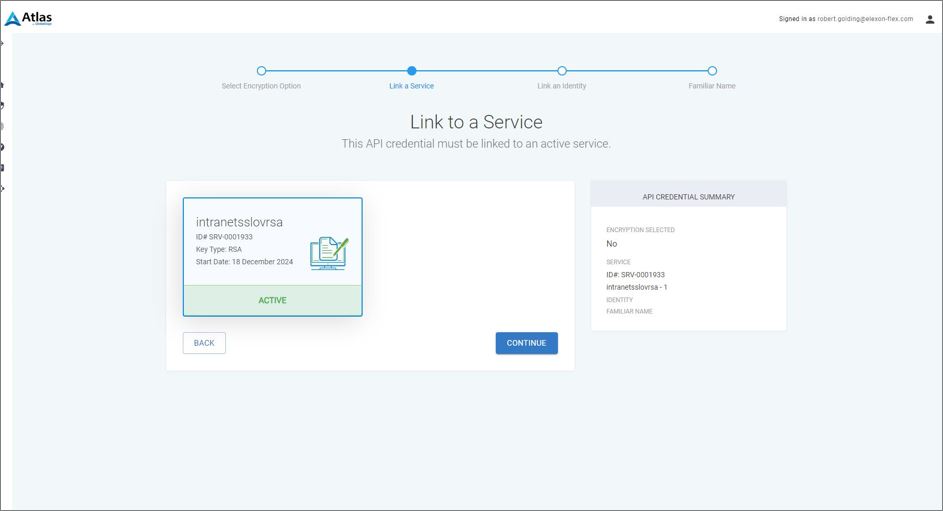
Select ACTIVE certificate to assign Internet SSL to your credentials, then click CONTINUE.
Give the credential a familiar name (any text you wish), record this safely and click ‘CONTINUE’.
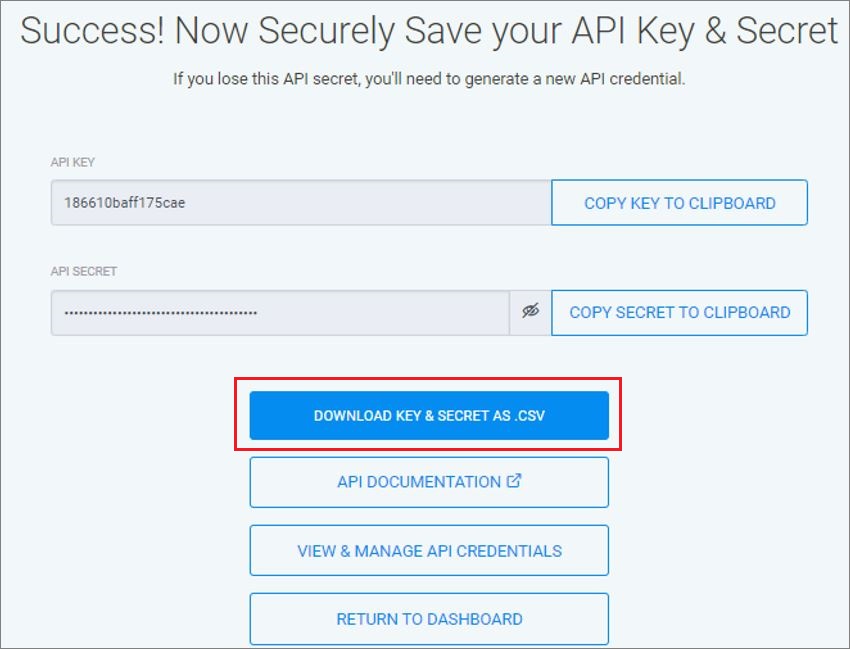
Click ‘Download key and secret as .csv’ button and save file. Alternatively click both the API Key and API Secret ‘Copy Key to clipboard’ and store in a .txt file for the next stage.
You must DOWNLOAD the .CSV file. Once you navigate away from this page you cannot return to access this content.
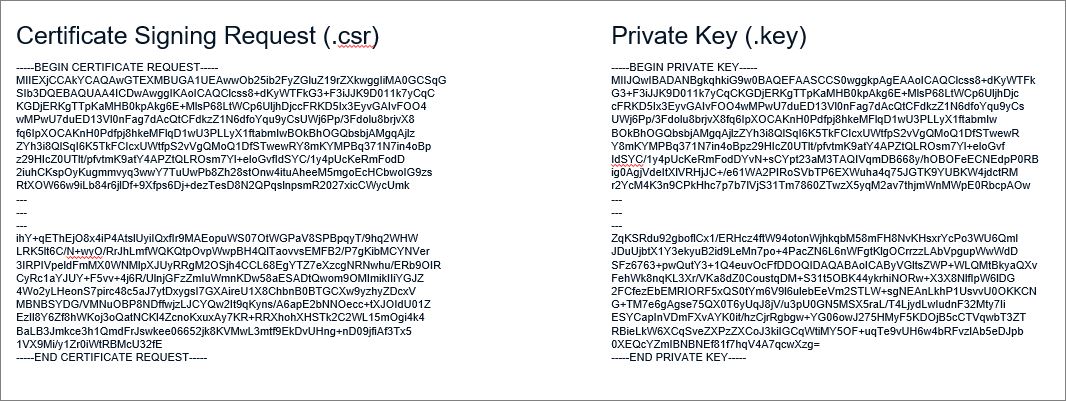
Generate CSR and Key file
You now have the API Key and Secret. The DIP requires a validated certificate in PFX format together with these API credentials. The following will be conducted outside of the DIP by someone with technical understanding of generating a certificate.
Select a CSR (Certificate Signing Request) generation tool and create a CSR. Two methods tried and tested are Azure Key Vault & OpenSSL.
Using Azure Key Vault
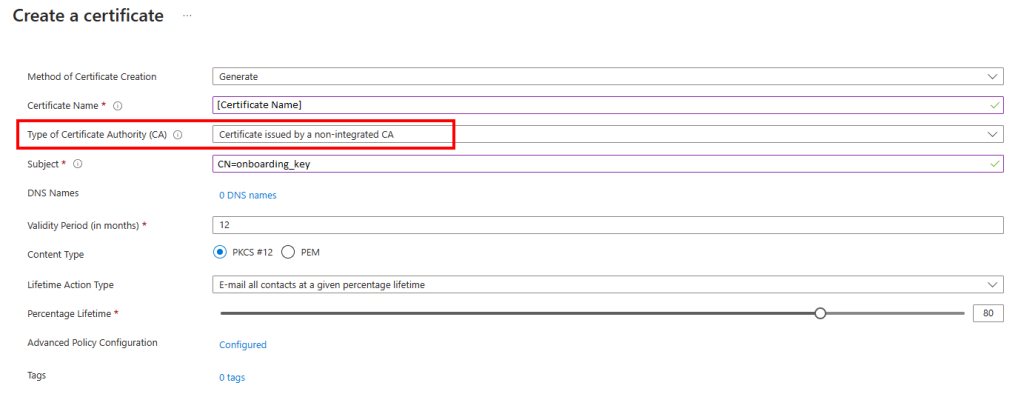
Within Azure Key Vault, select Request a Certificate.
In the ‘Type of Certificate Authority‘ field, select ‘Certificate issued by a non-integrated CA’.
Set the Subject to ‘CN=onboarding_key’
Select ‘Advanced Policy Configuration‘.
Change the Key Size to 4096 within this screen only.
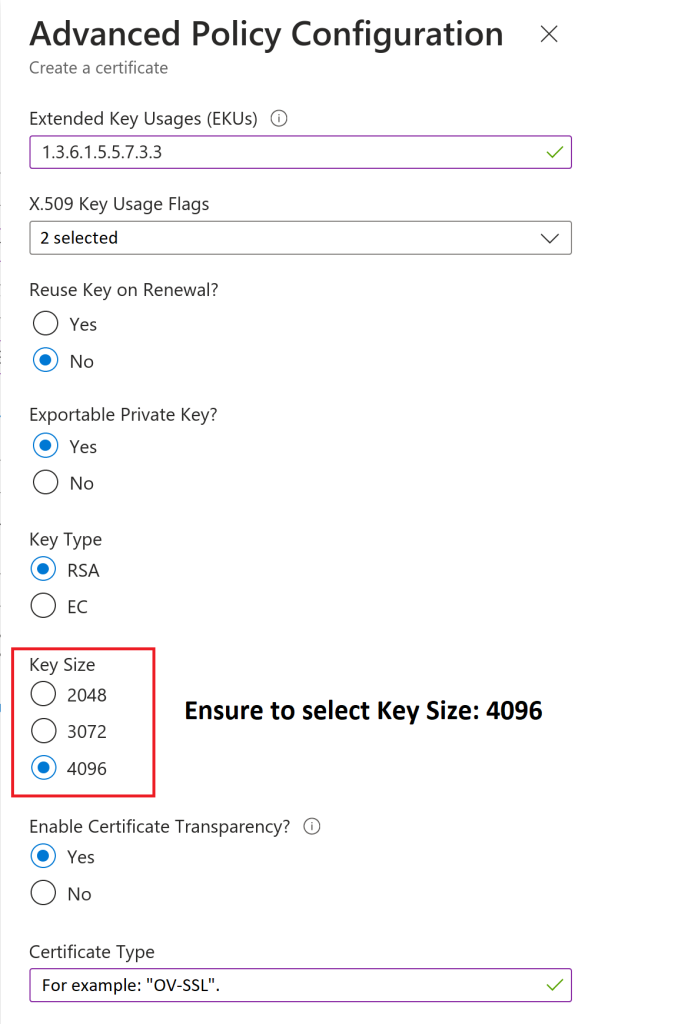
When defining your organisation’s ‘hostname’ and ‘domain’ there is a limit of 35 characters to be used between those two fields. This is to keep the CN field within the X.509 certificate specification. Note that the characters can be split between the two fields in any way.
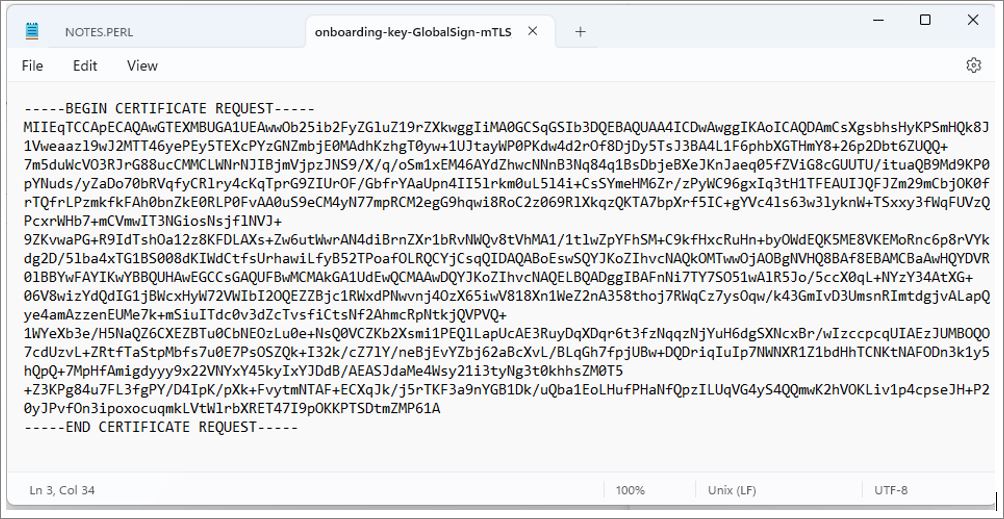
Click DOWNLOAD CSR to save your CSR file.
Open the CSR to check structure is correct.
Using OpenSSL
Using the following:
openssl req -new -newkey rsa:4096 -nodes -keyout apicert.key -out apicert.csr -subj “/CN=onboarding_key”.
Generating the correct key format for upload to the DIP
The Certificate Admin must return to the GlobalSign Atlas system to complete the next stage of certificate preparation for the DIP.
If you have appointed a new Certificate Admin into the Atlas account, they can complete the following steps.
- sign in to the Atlas system. Open your Dashboard and select ‘Generate mTLS Certificates’
- on the next screen select ‘Directly via the API’
- then select the API Credentials just made using the ‘Familiar Name’
- paste the CSR generated into the space provide then click CONTINUE
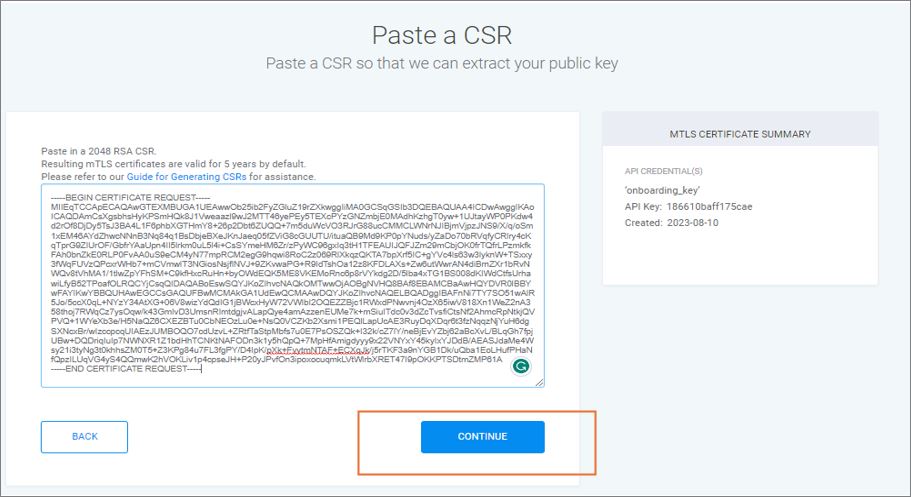
On success, use the button to copy the certificate, paste into text file.
Create a PFX Certificate for Upload to the DIP
The output from the GlobalSign system requires the key to be converted to PFX format. This is completed using OpenSSL
Complete the certificate request using the downloaded file.
Export the certificate and its private key, to a pfx file, ensuring no password is specified using your OpenSSL tool.
Azure Key Vault version
Add GlobalSign users (optional)
At this point of the process you may wish to assign additional Certificate Admins to complete the upcoming sections as more technical knowledge is required to complete the next onboarding steps.
This could be someone from the DCP or a third party technical person.
As well as adding the Certificate Admin to the DIP they should also be added as a new User Admin within GlobalSign.
Please note that additional Certificate Admins are not mandatory at this point – you can continue through the process should you wish.
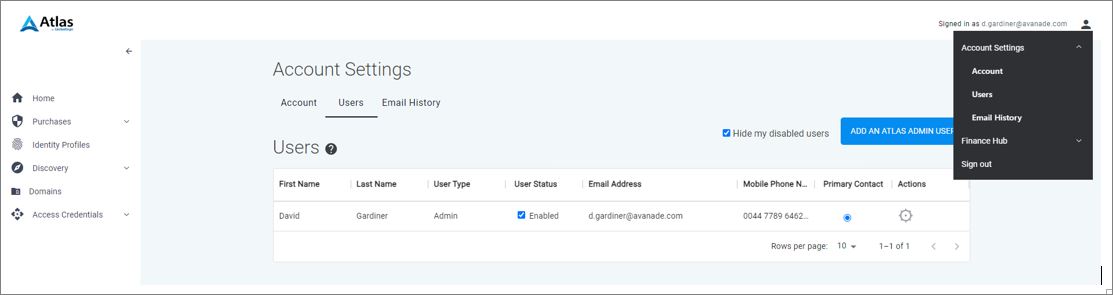
Assign a new Certificate Admin to GlobalSign Atlas account
Click the profile icon in the top-right corner. Select ‘Account Settings’ and then ‘Users’ to obtain the new user ADD screen.
Select ‘Add an Atlas Admin User’ and add your new Cert Admin to the account. This will result in a ‘New User Registration’ email being sent to that person.
If you have any issues with Global Sign certificates or vetting, you can contact Global Sign directly at [email protected]
Managing users in GlobalSign Atlas portal
When moving to Production, DIP Users may wish to ‘cleanse’ the users in the Atlas portal to accurately reflect the user base that will go into PROD.
The GlobalSign Atlas portal falls outside the scope of DIP Manager therefore as the primary Certificate Admin (the individual who is responsible for creating the Atlas Portal and initiating organisational vetting) it is your responsibility to manage what users have access.
We recommend liaising with your internal team/ DCP to discuss who has appropriate permissions. This can be done via the users setting which can be found in the top right corner under account settings.