This page offers guidance on how to obtain access to the Data Integration Platform (DIP) and verify your company details.
Links to all onboarding steps
- Step 1: Accessing DIP and verifying company details
- Step 2: Managing your company’s users within DIP
- Step 3: Managing your GlobalSign account as part of DIP
- Step 4: Managing DIP certificates
- Step 5: Domain verification
- Step 6: Creating a Signing/mTLS certificate
- Step 7: Managing your DIP / DCP IDs
- Step 8: Managing your DIP Message Channels
Before you start
You will need:
- to complete and return your DIP Onboarding Preparation Pro-Forma to [email protected]
- Microsoft Authenticator app on your phone, to enable multi-factor authentication (MFA)
- your email invitation from us to join the DIP.
If you did not receive the invitation but have been advised it has been sent, you can still follow the steps below.
The steps are the same for all DIP users after they have received the invitation e-mail.
Sign in to the DIP site
Please note that you should ensure the DIP website is added to your company IT access list so that it is not subject to quarantine or treated as a suspected phishing activity.
- Use the link in your invitation email or the appropriate link below to access the DIP log in page.
- Production (live) environment: portal.energydataintegrationplatform.co.uk
- Pre-production (test) environment: portal.uit.energydataintegrationplatform.co.uk
- Sign in with your username and password.

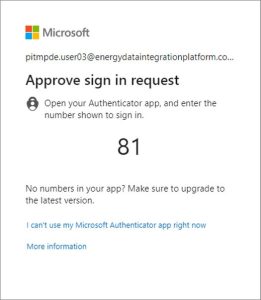
- Approve the sign in request using the Microsoft Authenticator app on your phone and follow the prompts it gives.
- Read and accept the Terms of Use (first time users only).
- Go to the DIP welcome page.

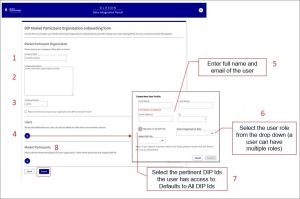
Verify company details (Primary User Admin only)
This activity can only be completed by a Primary User Admin.
You must enter or amend the following company details (on first use only):
- company name (mandatory field)
- company description (mandatory field)
- company number (mandatory field) and check box if you are acting as a Data Connection Provider (DCP)
When you have checked that all details are correct, click Submit or go on to create new users.
You can add other users now or do it later in the Members section.
To create the users now, click on the plus symbol (+) under Users and then follow the steps for managing your company’s users.
Do NOT add anything under Market Participants – this will be completed by Elexon.